How To Record Electronic Drums on iPhone
Electronic drums make it easy to record music at home since you can plug your drum kit into most devices to capture the sound. Many people use their PCs to do this, but what if you only have an iPhone? Luckily, you can still record your drum sessions using only your smartphone.
Here’s how to record electronic drums on an iPhone:
- Download a music recording app.
- Get the proper cables and adapters.
- Plug the cables into the correct ports.
- Set up your headphones.
- Test your drum kit and check for MIDI data.
- Assign sounds to all your drum pads.
- Record using the app you downloaded.
- Record using your camera app.
This process may sound complicated, but it’s easy once you’ve tried it for yourself. It does require a bit of setup using cables, though. But don’t worry: I’ll walk you through everything in this detailed guide, so make sure you keep reading.
1. Download a Music Recording App
First, check that you have a music recording app or Digital Audio Workstation (DAW). If you don’t, you’ll need to download one.
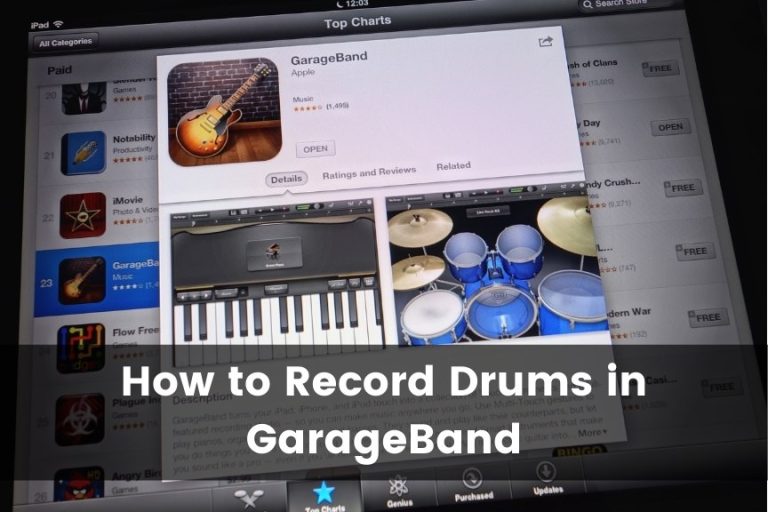
GarageBand is probably your best bet since it comes pre-installed on most iPhones and iPads. This software can work with your electronic drum kit and allows you to record music on your iPhone. If you don’t have GarageBand, you can always download it for free from Apple’s app store.
If you don’t want to use a DAW, you can always use your camera app — albeit with different equipment. However, many drummers prefer to use music software because it gives them more control over how their tracks turn out.
All of the above said, GarageBand is pretty easy to use, so I recommend using it instead of your camera app.
Best DAWs for Electronic Drums
There are so many different DAWs online. Many drummers use GarageBand because it already comes with their iPhone, but you can use any DAW that you think works best for you.
The important thing is to research your DAW options and choose the one with all the features you need to create your own music. Not all of them are free, so make sure you also consider your budget for the software, as these can get pricey.
For example, Ableton Live is an excellent option and works well for professional drummers. You can use it regardless of your skill level, and it has more potential than many other DAWs. It even works well during live performances. However, note that professionals use this software, so it’s not cheap.
Another option that you can find for free would be WavePad. It’s perfect for simple sound editing, recording, and exporting to your iPhone. However, it doesn’t offer as many features for free as GarageBand does.
In any case, you’ll need a DAW on your phone to record your electronic drums unless you plan on using your phone’s camera app to capture the sound. (I’ll get to that later.)
2. Get the Proper Cables and Adapters
Now that you have a music recording app, you’ll need to get the right cables to transfer the MIDI data from the drum set to your iPhone. If you don’t get the correct ones, your DAW won’t record the sound properly.
Depending on your drum kit, you can use a MIDI to USB B and a MIDI adapter or just the main MIDI to USB wire. A good option would be the MeloAudio USB B to MIDI cable (available on Amazon.com). It easily connects your electronic drum and iPhone without having to use any other parts. Note that some older electronic drums will still need the MIDI adapter to send data to your smart device.
I recommend the M-Audio Midisport Uno (available on Amazon.com) if you have a drum kit that requires a MIDI adapter. It’s very compact and can connect all of your audio equipment together. Plus, it’s universally compatible, so you can also use it with a Mac or Windows PC.
Another option is to use your audio jack instead of your phone’s lighting or charging port.
You can use a tool like iRig Midi 2 (available on Amazon.com) to do this. It links your media output on your drum kit to your iPhone’s audio port. It also includes universal compatibility, so you don’t have to use it exclusively with your Apple device. Lastly, you can use it with an iPhone headphone adapter if your iPhone doesn’t have an audio port.
In short, you’ll need to use cables to connect your iPhone and your drum kit. The cables you need will depend on how old your drum set is and what iPhone model you have. Make sure you review all of your ports before buying a cable. In most cases, the MeloAudio USB B to MIDI cable is the best option.
3. Plug the Cables into the Correct Ports
Now that you have all your cables, the next step is to plug them into the correct ports on your drum set and iPhone. There should be media output and input ports on your electronic drum kit. You want to put your cables into the drum’s media output jack and then plug them into your phone.
Many of these cables should have indicators that tell you which ones go where. Your electronic drum kit should also have labels on the ports, so you don’t have to spend too much time double-checking if your cables are in the right place.
Also, make sure you take the time to set up any required adapters. These should be between your phone and the drums, because you may need them if you can’t directly connect the two together.
Understanding the Ports on Your Drum Kit
Your drum kit might have a lot of different ports, but it should have at least a media input, output, and auxiliary port. There could even be more than one of each of these. Most drum kits also include USB and MIDI ports.
When setting up your iPhone to record music, you want to use the media output port, which sends sounds to your phone. You’ll also probably want to use the auxiliary port to wear headphones while you record.
If there are USB or MIDI ports, you can use those as well. However, you’ll need to use an adapter with your phone cable to ensure you can link them together properly.
4. Set Up Your Headphones
Setting up your headphones for recording is also simple. You don’t have to use them every time you play your drums, but many electric drummers prefer to wear a headset when recording, especially if they’re doing so at home.
You’ll need an ⅛ inch (3.18mm) auxiliary cord, like the MCSPER 2 Pack Aux Cable (available on Amazon.com). The cables are long, and you get two of them, allowing you to customize your drum set up even more. I also appreciate the 90-degree angle of the plug on the one side, so the wires don’t wear out easily.
The cable should go from your iPhone’s audio port to the auxiliary port on your drum kit. Afterward, you can plug in your headphones. This setup lets you hear what’s happening in your DAW when you strike the drum pads.
This method works best with a basic USB B to MIDI cable because it leaves your iPhone’s audio jack open.
Quick Fix for iPhone Not Recording Sound
If your iPhone isn’t recording your drum hits when you have your headphones plugged in, there’s a quick and easy fix you can use. Simply slide out the headphones part way from the auxiliary input. You only need to move it out one notch on the plug.
By doing so, you change the headphones to mono-sound instead of stereo-sound. This prevents your headphones from canceling sound output, so your phone can record you playing the drums.
When your iPhone doesn’t seem to record you playing, you should try this first because it takes only a second to slide the headphone jack out slightly.
5. Test Your Drum Kit and Check for MIDI Data
You need to ensure that your drum kit sends the correct MIDI data to your DAW. It’s pretty straightforward to do this in GarageBand, as follows:
- After plugging in everything, go to the drum section in the app.
- Try striking all of the drum pads on your kit while recording.
- Go to the recording and open the edit section.
- Check that your DAW recorded all of the MIDI data. GarageBand will show all the hits recorded, although the ones at the top of the screen won’t be assigned a sound. (I’ll explain how to correct this in the section below.) Essentially, you want to see that the DAW accepts all of your drum kit’s MIDI data, even if they aren’t assigned to the correct instruments yet.
- If your DAW isn’t accepting the MIDI data, you’ll want to check that you have all the right cables and adapters.
- Try playing a test track again.
- Once you can see that the DAW recorded all of your drum pads, you can work on assigning them to the correct instruments.
This process is different with every DAW, but it’s very simple to do in GarageBand.
Fix for GarageBand Not Recording MIDI Data
If you can’t get GarageBand to show your drum hits in your test tracks, you’ll want to do the following:
- Open the tab in the top left corner of the screen.
- Open “Preferences.” From there, you should find a section labeled “Audio/MIDI.”
- Open “Audio/MIDI” and check that your electronic drum kit is set as your input device. If you’ve used GarageBand with other electronic instruments, it might still be set to record those instead. It might not make the switch to your electronic drum kit automatically.
When GarageBand is set to another instrument, the app won’t record the MIDI data, so your hits won’t show up. You may want to check that you have the electronic drum kit selected before you try rearranging all of your cables.
6. Assign Sounds to All Your Drum Pads
If there were issues with the hits not corresponding with the right drum pads, you could move them using the editing section of GarageBand. Make sure to review all of the hits so you know the pads have the correct sounds assigned to them.
You do this by sliding your hits up or down on the screen. You want them to correspond with an instrument on the left side of the screen. Move any hits from the top unassigned section to their instrument, then check the audio. Most of the time, it should only take a few minutes to figure out what instrument goes with what drum pad. You can even change them to make different sounds.
Sometimes, the drum pads link to the wrong instrument in GarageBand. You’ll need to move those hits to the right areas as well. Overall, you should be able to change and set sounds linked to your drum pads in most DAW software.
7. Record Using the App You Downloaded
Now, you’re ready to record your tracks. Using GarageBand, you’ll find the record button in the control bar. Most DAWs make it obvious where the record button is, so you shouldn’t have trouble finding it.
You can set up a metronome to help keep you on the beat. After hitting the record button, you’ll receive a countdown, and the metronome will start. You can play and record until you get a track you’re comfortable with. Just hit the stop button when you’re finished playing.
From there, you’ll probably want to save and export your tracks. GarageBand allows you to export using a variety of file formats, including:
- MP3
- AAC
- WAVE
- AIFF
You can edit and upload your tracks to SoundCloud, YouTube, and many other platforms. Plus, you can store these file types on your PC or a memory card. It’s always good to export and back up your finished tracks so you don’t lose them, no matter what DAW you use.
8. Record Using Your Camera App
It’s also possible to skip using a DAW and record directly in your camera app. Keep in mind that this method will only give you mono-sound, so it may not sound as professional to you. However, it’s still a great option for sharing your music online.
You can record using your camera app with an adapter like the iRig mentioned above as follows:
- Plug the tool into your drum kit’s output port, then plug it into your phone using its auxiliary port.
- Hit record in your camera app and start playing. Your phone will record the sound your electronic drums make.
- Once you have a recording, you can export it to video editing software and use the sound to create a track. It’s a bit more complicated than editing your track directly in a DAW, but it still works well for many drummers.
This quick YouTube video covers how to record using your camera app in detail:
When To Record in the Camera App
Recording with your iPhone’s camera app won’t give you as high sound quality as a DAW. However, that doesn’t mean that you should never do it. Camera apps are free and accessible on every iPhone, no matter the model. That makes it perfect for when you want to record for fun.
You can always use the camera app when you want to review a drum session. You also can use it to record samples for instructors or post on social media. In any case, you’re sure to find a use for it, even if it’s not a “professional” option.
The camera app is another convenient way to record drum tracks with your iPhone. Most of the time, it requires fewer adapters since it’s not using MIDI data, so you won’t have to spend as much on equipment to get it to work. However, you sacrifice sound and editing quality when you’re not using a DAW.
Recording Electronic Drums on iPhone vs. PC
Many drummers prefer to record their drums on a computer. However, both options have pros and cons, so you can still benefit from only using an iPhone.
For instance, carrying your phone around is easy, adding to the portability of recording with an electronic drum kit. Plus, more people have access to a smartphone today than in the past.
That said, computer versions of DAWs are more advanced than their mobile app counterparts.
For example, GarageBand has both iOS and macOS options. The macOS version is for Apple computers and laptops and has more features than the GarageBand app. The iOS version you use on your iPhone is much simpler.
It’s a good idea to experiment with the various recording options you have as a drummer. You might find that you like one more than the rest.
Final Thoughts
You can record tracks using your drum kit and an iPhone. The recording process is relatively simple once you have the proper adapters and cables. Many people use recording apps, like GarageBand, although you can always use your camera app if you don’t have a DAW.
Recording on your iPhone makes sharing your best tracks online simple. It’s fun to share your work with other drummers, so give it a try!