How To Record Drums: The Ultimate Guide
While the recording of drums has changed dramatically over the years, the basic principles remain the same. You want to capture a clean sound that highlights each drum’s element while also giving you some flexibility in editing. Recording drums is a little different from recording other instruments.
When recording drums, many factors can affect the final product’s sound. Using a suitable drum kit, placing it in the right location, and having a mic setup are vital to achieving your desired sound. The hardware and software you’ll need will vary depending on the sound you want to record.
Setting up the mics and choosing the correct kit depends on the tune you want to convey. But some basic principles apply to almost every drum recording situation.
In this article will be your complete guide on how to record drums. The following sections of this article cover everything you need to know to achieve the perfect drum kit recording, whether you’re using acoustic or electronic drums.
How to Record Acoustic Drums
If writing a song is like building a house, then recording drums is like laying the foundation. The rest of the music can be completed without it, but this is where it all begins. There’s no formula for getting a great drum sound.
The perfect recording session for acoustic drums is achieved using the correct equipment. You’ll need to use a suitable drum kit, place it in the right location, and select the right mic for each drum.
Let’s dive deeper into the space and equipment you’ll need to improve your overall sound.
The Recording Room
Recording drums is an art. It’s also a science. These two come together in an essential part of the process: the recording space. You’ll use this to capture the sound of your drums, and your recording will depend on its quality.
When you want to record drums, you must first consider where to do it. Several factors will determine this, including the type of song you’re recording, the room’s acoustic elements, and the music style. While one room might be better for recording some techniques than others, there are plenty of options.
Firstly, your room should also have optimal soundproofing so that all you hear are the drums and nothing else.
Secondly, to create a sound drum recording, you need a room that encourages the reverb you want while dampening the reverb you don’t want.
If your recording room has too much reverb, the sound will be too bright and is considered over lively (like a garage). The most effective way to prevent this is to introduce materials such as carpets and pillows that will absorb the lively sounds.
However, if you’re recording in a room with abundant carpets and other items that absorb sound, your recording will be at risk of sounding dead due to a lack of reverb. You can remove these items from the room or introduce more reflective surfaces to counteract this. Plywood is a great option.
Hardware
While you can still use a computer to record and edit sound, it won’t give you the same feel as a recording of drums recorded in a professional studio. Luckily, thanks to an abundance of affordable recording gear, you can get as close to a studio as possible in the comfort of your room.
Before recording, it’s essential to know what hardware is needed to record your sounds correctly.
Drum Kit
The depth of sounds you can get from a drum kit is about as broad as you can imagine. Your ability to get those sounds will depend mainly on three elements:
- Type of drum set used.
- Choice of heads.
- Skill with which you play.
The first step in getting good sound out of your drums is to have an appropriate drum set for your purposes. You’ll get the best sound out of a new, high-end drum set.
Getting the best cymbals possible will also enhance the sound of your recording. Nothing during the recording process can fix a poor-sounding cymbal. So, it’s vital to ensure your cymbals are sounding great beforehand.
The next step is choosing suitable drum heads for your setup. Different types of heads create different kinds of sounds. Whatever sound you’re looking for, it’s best to opt for new drum heads as they’ll enhance your recording by providing a vivid sound.
You’ll ensure a perfect recording session if these two elements are up to scratch and combined with killer playing skills. However, one thing that will hinder your recording session is your drumset being out of tune.
Tuning the Drum Kit
Tuning a drum kit can be complicated. Many musicians have trouble with it, and it’s not uncommon to find a drummer who doesn’t know how to tune their kit.
While tuning your drums might seem daunting, it’s a straightforward process. Remember that getting a drum to sound good takes time and effort, so be patient as you go through the steps. You’ll be well rewarded for your efforts.
Using a Soulmate Drum Key (from Amazon) will make it easier to tighten and loosen the lugs that connect the head to the drum. You’ll hear each note’s sound as you tighten or loosen the head by tapping the drum with a stick.
Here is a simple guide to tuning your drum kit:
- Center your drum head.
- Using your drum key in a diagonal pattern, tighten each tension rod.
- Remove wrinkles and ensure the head becomes stretched as you go through the process for each drum.
- Tune the resonant drum head.
- Repeat this whole process for the batter drum head
- Fine tune your drums to your desired sound.
For an in-depth explanation, here is a YouTube video to assist you.
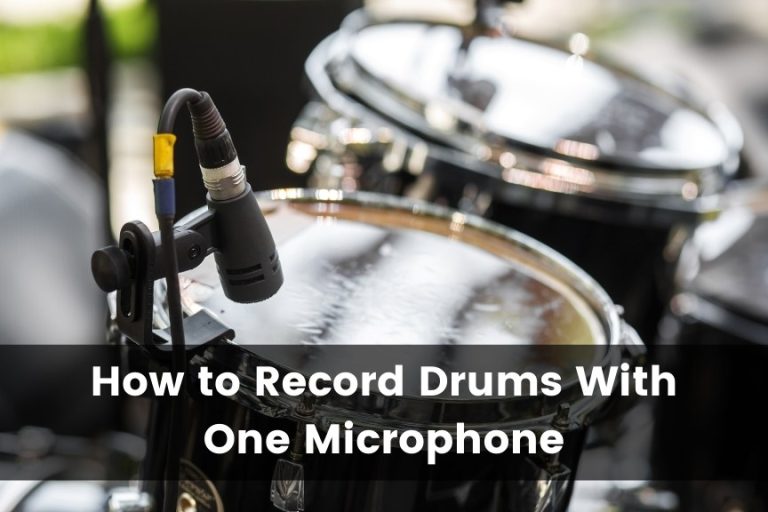
Microphones
While there are various miking techniques, it’s important to note that you’ll get the best sound from a complete set of drum microphones. Professionals will use a microphone for every kit component, plus at least two overhead microphones.
You can record with fewer microphones. The quality of your sound will always be better with more. The more mics you have, the greater you’ll be able to control the sound of your kit during the editing phase.
Unfortunately, mics can get quite expensive. An excellent option would be to purchase a drum mic set. The Samson DK707 7-Piece Drum Microphone Kit from Amazon is of excellent quality and produces stunning sound in a unidirectional polar pattern.
The set includes:
- 4 – Q72 instrument mics.
- 1 – Q71 kick drum mic.
- 2 – CO2 pencil condenser mics for overhead miking.
- 7 – swivel-style mic adapters.
- 4 – tension-mounted rim clips.
- 1 – hardshell carrying case.
Alternatively, there are a lot of microphone options for you to explore.
The microphone’s placement is critical in delivering a good sound. You should know what works best with each drum and how to set up the mics for optimal sound quality.
Setting Up the Mics
The goal is always to capture the best possible balance of sounds between the individual components. Here’s a quick guide to positioning your mics for various sounds and some tips on getting the best results from them.
Setting the mics up close to the drums will create a more direct sound with more high-end frequencies. This will make snare drum hits sound brighter, and cymbals ring more clearly when mixed in with other drums later. However, the loud cymbals could also get distracting if it overwhelms everything else that is going on in your recording.
Ultimately, it’s good to have a balanced setup. To help you achieve that, here’s a video demonstrating exactly how you should mic your drum kit:
XLR Cables
XLR cables are an essential part of the recording and live sound world. They allow devices to be plugged together in a way that guarantees a strong, clear signal without interference from outside factors.
These cables are a type of cable that is used to connect microphones to audio consoles and recording devices. XLR cables have three connectors, two female and one male.
The male connector goes into the microphone, one of the female connectors goes into the console or recording device, and the other female connector goes into a preamplifier (if your audio interface doesn’t have one built-in).
It’s recommended to get the most extended XLR cables you can find so that they can easily reach around your drum kit and to your microphones from the audio interface. The most important thing about using XLR cables for professional recording is buying good-quality cables for excellent sound quality.
Audio Interface
An audio interface is a tool that allows you to connect your microphones (via XLR cables) to your computer enabling you to record music.
It’s an essential part of recording because it offers more inputs (the different things you can plug in) and outputs (the places you can send sound) than most computers do by themselves.
When you buy an audio interface, you’ll get inputs for any instrument or microphone you want to record, plus at least one output for sending that sound to your computer. This lets you record multiple sounds simultaneously instead of needing to record them separately.
When you’re recording the drums, you want all the sounds being played to be heard together. Therefore, you require an audio interface with as many inputs as microphones you intend to utilize.
Computer
If you’re going to record drums, you’ll have to have a computer. There’s just no way around it. Why? For starters, you can use a computer to record audio into your DAW (Digital Audio Workstation).
You can also use it to arrange and store your music files, such as samples, audio, and MIDI files associated with your recordings.
What you will have to ensure is that you have a computer that will be compatible with a digital audio workstation. Whether you decide to use a Mac or Windows computer is up to you, you just need to make sure your computer can connect to the audio interface via USB ports.
Headphones
If you’re serious about making a home recording, there’s one piece of gear you need: a pair of high-quality headphones.
You can get better, faster results by using headphones. Not only will your recordings sound better, but you’ll also be able to pick up things like the sound of the cymbals being too loud. If you’re recording drums, you want to avoid that at all cost!
They’re also used to monitor sound levels and to keep everything balanced, they are vital if you’re going to be doing any tracking, recording, or editing.
A good pair of headphones is necessary to enhance your recording and mixing sessions. You want to hear the sounds as clearly as possible to get the best results.
Sennheiser HD 660 S headphones (available on Amazon.com) are high quality and will ensure your audio playback is crisp. However, they can be pretty pricey.
Sony MDR7506 Professional Large Diaphragm Headphones (available on Amazon.com) are a great alternative that comes at a lower price while still being of excellent quality.
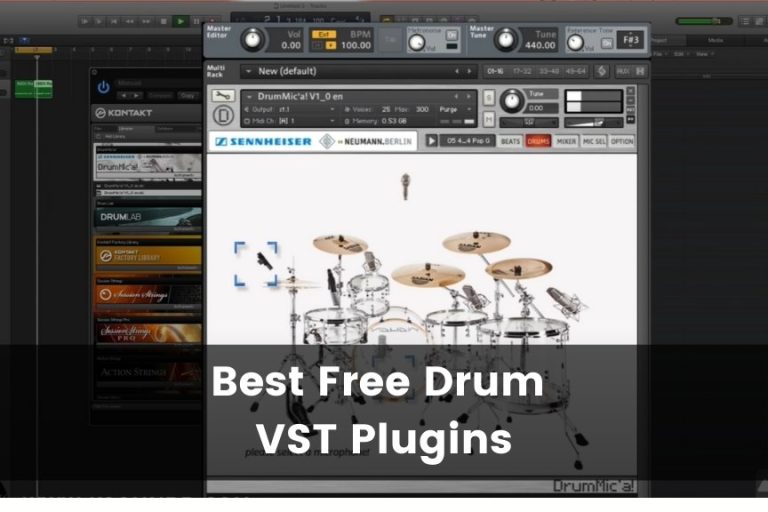
Software
Software is necessary for recording drums because it helps you accurately capture the sound of the drums. It also gives you a wide range of editing tools that allow you to change the sounds of your recordings and make them more suitable for your song.
No matter how great your mics or skill at playing drums are, your recorded tracks will continually be improved using a Digital Audio Workstation (DAW).
When it comes to the recording of drums, a DAW is critical for producing quality tracks. DAW software allows you to record, edit and master your music. With so many options on the market, there are plenty of programs, but these are some of the most popular choices:
For Mac:
For Windows:
There are plenty of free DAWs that are perfectly capable of getting the job done, but some people just can’t get past the idea of paying for software.
A good quality Digital Audio Workstation will have all the features you need to record and mix your sound, from multiple insert points to virtual instruments. It’ll also be able to handle various instrument tracks at once and automate any changes you want to make.
You don’t need anything fancy, but having a little wiggle room in your budget for a good DAW can save you some headaches down the line.
How to Record Electronic Drums
While electronic drums lack the finesse of acoustic drums, they make up for it with their variety and ease of use. Many include features like Musical Instrument Digital Interface (MIDI) compatibility and sound editing software, making them an excellent choice for home recording studios.
Most modern electronic drums are compatible with a USB cable, making them much more straightforward than their acoustic counterparts during the recording process. You needn’t worry about a room’s reverb, reflective surfaces, or microphones and their positioning.
All you’ll need to record with an electronic kit is:
- Good-quality headphones.
- A USB cable.
- A USB-compatible computer.
- DAW software.
You’ll have to insert one USB end into your kit and the other into your computer. This will connect your electronic kit straight into your DAW software, making the kit an audio interface. Then you’ll quite literally be able to record straight away.
Be sure to plug in your headphones while recording to ensure you get the crisp sound you’re looking for.
Ultimately, there’s more freedom with an electronic kit in the recording process. You’ll spend less time setting up your studio and they require minor TLC. You can just sit down and start recording in no time.
Even though the sounds produced by electric and acoustic drums differ, once you’re set up, the recording and mixing process will be pretty much the same.
The Recording Process
So, you’ve got your kit and equipment together and are finally set up and ready to record your first track. This is a great moment to take a deep breath and appreciate the hard work that’s gone into this point. It’s also an excellent time to ensure you’re comfortable with all the little details of the recording process.
If you’re a drummer, you know that the ideal drum sound comes from using multiple microphones on each drum head. Going as far as recording each sound individually is the best way to get the most out of what you want to record.
This is often referred to as multitracking and involves dividing the drums into separate tracks in your DAW. The different microphones are used to relay each sound.
This fun and creative process can be gratifying if you have the right approach. Here are some tips for getting the most out of this phase of the recording process:
- Once everything is set up, do not move anything. If you want consistent results, it’s important not to move the microphone positions.
- Make sure you’re wearing headphones. This will help you hear while playing and monitor what’s feeding into the mic.
- Different microphones and mic placements will capture different frequency ranges. Make sure you check which mics are picking up what frequencies. This way, you can customize your sound and make sure everything is captured correctly.
- Check that all levels on your mixer are set correctly so they’re not peaking or distorting. You don’t want any unwanted background noises getting mixed into your track!
- Play to a click sound. This will create a tight and consistent rhythm, making editing much easier later.
- Consistency is key to making a sound recording. Playing with balance and consistency is vital to avoiding fluctuations on your track when you’re recording.
- Be sure to strike the drum skins clearly. The center of the drums is where you’ll find a full sound. This will help create the best sound.
- Have fun! It’s easy to get confused by the details, but at the end of the day, it’s about capturing the energy and a vibe.
There are several approaches to getting great recordings. It may take time, but there are infinite ways to make something unique and memorable if you put your heart into it.
The best records are made by people who enjoy what they do and don’t give up until they get exactly what they’re looking for.
For a more extensive guide to the recording process and utilizing your DAW during it, here is a video to help you.
The Mixing Process
Preparing to mix and edit your drums is one of the most critical parts of the recording process. Mixing is one of the most intimidating things for a new producer. Knowing how to mold the sounds you’ve captured into a polished mix that will sound great on any set of speakers is challenging.
It can be intimidating when you think about how much processing power your DAW has, what all those knobs are for, and how every setting will affect your final product. You’ll need to use your high-quality headphones to ensure you hear every bit of detail.
To assist you, you’ll find a list of tools below that you can use to achieve a good sound when mixing.
- Balance
- EQ
- Compression
- Reverb
Let us look at the finer details of these tools.
Balance
Balance is one of the most important things to consider when mixing your drums. The bass drum, snare, toms, and cymbals are the foundations of your drum mix. They should be balanced in a way that moves the song forward.
When you first begin mixing your recording, starting with a reference track is best. Find a song you enjoy, preferably something with similar instrumentation. You want to find a similar kick drum sound in your reference track and a similar snare and cymbal sound.
Once you have all those elements in harmony, you can adjust them individually to get your sound.
EQ
You know your music, the instrument you’re mixing, and the song. The last thing to do is ensure that the song translates well on any sound system. For that, you need to start thinking about EQ (equalization).
I’m not going to get too technical here. There are plenty of great resources already out there. But I will go over some basics that will help you get started.
EQ is a matter of balancing out the frequency spectrum so that sounds can be heard clearly without getting muddled with each other. In this instance, EQ means adjusting the frequency spectrum of your snare, toms, kick drum, cymbals, and overhead mics.
When equalizing, you’re not just looking to tweak the sound of a given instrument, so it’s as pleasing as possible. You want to make it work with the other instruments in your mix.
This is where EQ comes in handy. If you have a flabby bass or snare drum that sounds too muddy or boomy, cut some low end out of that frequency of the bass or snare drum. If your cymbals sound too harsh on their own, roll off the high-end from that frequency.
Compression
Compression is one of the most crucial tools when mixing the drums. It can help create a sense of drive and intensity in a song, or it can even help give a subtle sense of control over the rhythm.
Compression is usually used on drums to help them cut through the mix better, so you want to ensure that your compression isn’t creating a sense of being squashed together.
To avoid this problem, ensure that you set your attack and release times as short as possible but not so short that there’s no difference between them. If you’re having trouble making out individual hits on your recording, it’s probably because your attack or release time is too long.
You should experiment with different settings until you find something that compliments the sound you’re trying to achieve.
Reverb
Contrary to its name, reverb doesn’t necessarily need to be recorded in an actual reverberant space–it’s a signal processing effect that simulates the impact of a room. A room has various properties, one of which is how long sound takes to die away after it’s made.
In general, if you are trying to gain a bright sound or recording in a room with poor acoustics, using a slight reverb will help capture the clarity of the sound.
A larger reverb will add an extra dimension to the sounds, creating a sense of space around the drums that can be used to mask any imperfections in the room.
Reverb is essentially the sound of the drums after they have been produced. There are many different types of reverbs. Here are some of the most common reverbs you’ll need to use:
- Room.
- Hall.
- Plate.
- Chamber.
- Spring.
You’ll want to set the reverb to a setting that compliments the sound you want to achieve.
Using multiple reverbs for one song may give it an unnatural feel, so try and pick one that works best for your track and stick with it.
Here is an in-depth guide to assist you with the mixing process.
Key Takeaways
Recording drums is a delicate process, and getting the best sound possible out of it is an art form. It’s a task that requires patience, creativity, technical know-how, and, most importantly: trial and error.
We’ve covered a lot, from setting up the software and hardware, choosing a drum kit, recording on both acoustic and electronic drums, to mixing your recordings to get the perfect sound.
There is a lot to consider seriously before attempting to record your first drum tracks, and it tends to be overwhelming at first, but don’t let that keep you from trying it.