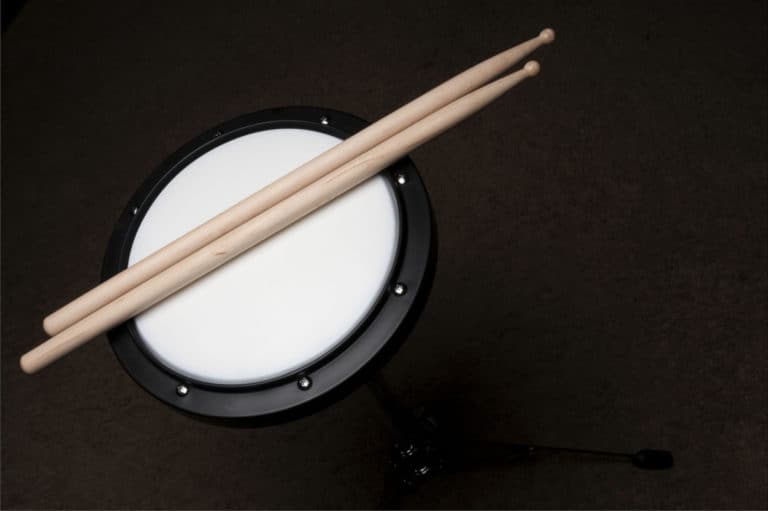
How To Tune A Snare Drum (Step by Step Guide)
The snare is arguably the most important drum in any kit. Without the snare, the kit is incomplete, and a snare can even be used on its own to create some excellent rhythms and sounds. However, tuning a snare drum and getting it to sound good can be very challenging. Knowing how to tune a snare is the key to getting to sound as good as possible and is a vital skill for every drummer to master.
To tune a snare drum, tighten the resonant head as tight as it can go without creaking. Next, tune the batter head incrementally until the drum is tight and vibrates well. Adjust the tuning until the drum sounds as good as possible. A good-sounding snare is vital for every drum sound.
Learning how to tune a snare well will provide you with the best possible snare drum sound with your set up. Without a well0-tunes snare, no kit will sound as good as it could, and the sound of a badly tuned snare can ruin the overall sound and feel of a song. Let’s learn how to tune a snare drum well to improve the sound of your drumming overall.
How To Tune A Snare Drum: Step-By-Step
If your snare sounds bad when you play it, if it does not sit in a mix well, if it sounds harsh or empty, or if you have just installed a new drum head, it is time to tune your snare.
The process of tuning a snare drum does not have to be as difficult as some drummers make it out to be. This process is vital for creating a good snare and overall drum sound, but it does not have to be a difficult thing to do.
Every drummer must learn how to tune a snare drum well, but learning the right steps and the proper method reduces the time and effort that is required to complete the process, it makes the process much more straightforward and enjoyable, and enables a drummer to play with their ideal snare tone easily.
Let’s cover the process of tuning a snare drum step by step to ensure that you understand the best way to do it, learn some important tips and tricks, and how to tell when your snare drum is tuned well.
Step 1: Loosen The Snares
The very first step in tuning a snare drum, regardless of why you are tuning it or how it sounds already, is to loosen the snares.
The snares are the wires that run along the underside of the resonant head and give the snare its signature sound. The snares must be loose in order to tune the drum properly.
Loosening the snares will enable you to hear what the snare heads sound like without any interference from the snare wires. This will allow you to tune the drum well without making any mistakes or missing any unwanted sounds.
Loosening the snares is as easy as flipping the lever on the side of the drum that releases the tension on the wires. Alternatively, you can loosen the screw that tensions the snare wires. Loosening this screw will further detach the snares from the drum to give as clear a sound as possible.
Step 2: Loosen The Tension Rods
The next step in the process of tuning is to loosen all of the tension rods on the snare drum. The tension rods are found all around the rim of the batter and resonant heads on the snare drum.
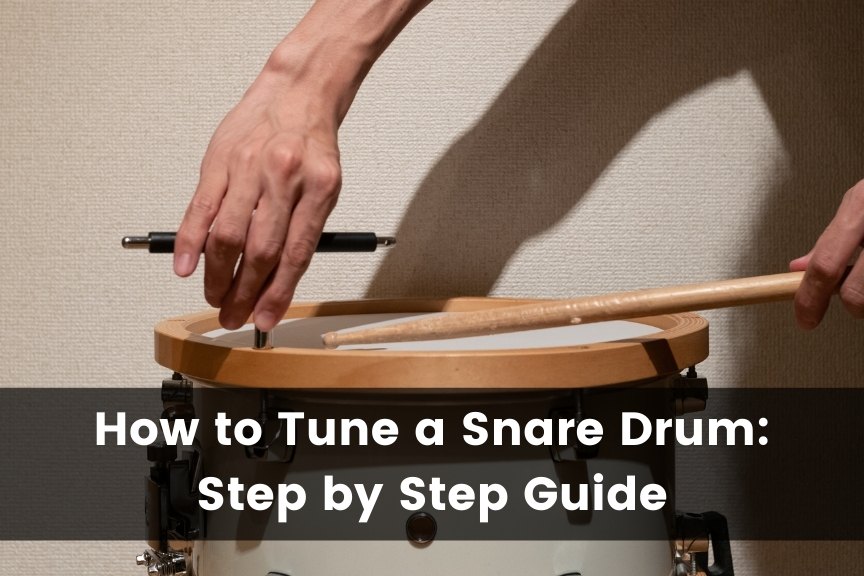
The tension rods on the snare drum keep the heads tight and in tune. They must be manipulated with a rum key for the best results.
Loosening the tension rods at the beginning of the process provides a clean slate to work from and allows you to tune the drum as evenly as possible to create the best sound possible from the drum.
If you begin the process of tuning a snare with tight tension rods, the process will be much more difficult and frustrating than it needs to be.
All of the tension rods should be loosened, including the tension rods on the bottom of the snare that control the tension of the resonant head.
Step 3: Tighten All Tension Rods Evenly
Once all of the tension rods are loosened, turn the drum batter-side down, keeping the drum on the stand and being sure that the batter head is not touching the stand at all.
Begin the tuning process by tightening all of the tension rods to ‘finger-tight.’ Use a drum key to tighten all of the tension rods on the resonant head until they are touching the hoop assembly.
Do not tighten the tension rods further than this at this point in the process. Once the resonant head tension rods are tight to this point, turn the drum over and repeat the process on the batter head.
Be sure that all of the tension rods are turned until they are slightly tight but as evenly tight as possible be sure to tighten the tension rods across the drum heads in a zigzag pattern, rather than to work around in a circle.
Using a zigzag pattern will ensure that the heads tighten evenly. If you tighten the heads in a circular pattern, the tension will change as you move around the drum, and it will never fully settle into tune.
Step 4: Tune The Resonant Head
After tightening all of the tension rods on the snare until they touch the hoop assembly, the next step in the snare tuning process is to turn the snare back over onto the batter side and tune the resonant head.
Tuning the resonant head of the snare drum is critical, but it is much easier than tuning the batter head of the drum. The resonant head must be tuned well so that it resonates well with the batter head when the drum is played, resulting in an even tone from the drum.
To tune the resonant head, simply tighten every tension rod down very tightly, as evenly as you can. Work your way across the drum incrementally, never tightening one tension rod all the way down on its own.
Tighten every tension rod to the same point, making sure that each rod is as tight as it can go without causing any creaking or cracking sounds. These sounds mean that the tension rods are too tight. The drum will feel tight as you tighten the tension rods, and you will feel when they are as tight as they should be.
Making sure that the resonant head is evenly tight everywhere is all it takes to tune this part of the drum, but it is a vital component of a good-sounding snare drum.
Step 5: Tune The Batter Head
The next step is the most important part of the process. It is now time to tune the batter head of the snare drum.
Turn the drum back over onto the resonant side and get your drum key ready for tuning the batter head. Carefully work your way across the batter, head tightening the tension rods as evenly as you can.
Work through each tension rod in the same zigzag as before, tightening the tension rods incrementally as you go along.
When the batter head begins to feel and sound tight, the drum is close to being in tune. Take the time to tighten the tension rods until they are quite tight but not as tight as those on the resonant head.
The drum will begin to feel alive and resonate as you talk or bump the drum. This means that the drum is vibrating and resonating well.
Step 6: Listen To The Drum
This step is simple and short, but it is critical. As you tension the batter head, take a moment after each round of tightening to tap the drum and listen to the way it sounds.
Tape the batter head with your finger or with a drum stick in the center and all around the drum head. The head should sound even everywhere as you test the tuning of the drum.
A drum can only be tuned by ear, so be sure to listen carefully for tones and characteristics that you do not want to hear.
As you tune the drum, make adjustments according to what you hear rather than what you think should happen. Listen to the sound and tone of the snare drum and tighten the batter head until it sounds good to you and meets your snare tone preferences.
Step 7: Tighten The Snares
At this stage, you can tighten the snares to where they should be. Take this opportunity to set your snare wires to where they sound as good as they can before you move.
Tighten the tension on the snare wires by lifting the lever on the side of the snare. Play the drum and listen to how the snares resonate with the resonant head. If they sound flat and dead, loosen the snares a little. If the snares sound hollow and dull without any resonation, tighten them down a little.
Set the snares to where you want them to before moving on to the next step in the process.
Step 8: Test The Drum
Now is the time to test your snare drum. Set the drum on its stand and [place it with the rest of your kit. Play the drum as you normally would and run some of your favorite drills and patterns.
Listen to the way the drum sounds and pay attention to how it feels and responds as you play. This will tell you if the snare is tuned as you would like it to be or if there are some adjustments that still need to be made.
Step 9: Make Adjustments
If you are not completely satisfied with the way the snare sounds at this point, take the time to make some adjustments until it does.
If the snare sounds too low for your preferences, tighten the tension rods on the batter head until the pitch is raised to where you like it. The inverse is true if the drum sounds too high for your preference.
Never adjust the resonant head to try and improve the way the drum sounds. The resonant head should always be tight and even, while the batter head should be tuned to your liking.
Step 10: Enjoy Drum, Make Adjustments As You Go
At this point, the snare is fully tuned and ready to be played!
Pick up your sticks and jam. Play your kit for a while, listen to the way the snare sounds, pay attention to how it feels, compare it to what you think a good snare should sound, and listen closely with a critical ear.
If you are happy with your snare tone, then your job is done! However, do not be afraid to make further adjustments until the snare sounds perfect. Taking the time to nail the tuning of your snare is the key to a great sounding kit.
Play your snare and make adjustments until you are completely happy with the way it sounds, and you will never be frustrated by your snare tone again!
Tuning Tips And Tricks
Throughout the process of tuning your snare drum, there are some important tips and tricks that can be of great benefit along the way.
One of the best tips here is to use two drum keys when tuning your snare. Using two keys on opposite ends of the drum when tuning makes allows you to tune very evenly and saves a lot of time along the way.
Another thing to remember is you must tune your drum by listening to it. Every snare drum sounds different, and every set up sounds different. Do not try to replicate what someone else has done with their snare tuning process, and never try to get your snare to sound like something that it’s not.
Tune the snare by ear, getting your particular snare to sound as good as possible, and you will never be disappointed with the tone.
The last tip here is to remember that if the resonant head of the snare is tightened down well, the batter head will sound good in a range of low, mid, and high tuning positions. This means that you can adjust the tuning of your snare to suit your needs without ever touching the tuning of the resonant head.
Conclusion
In the end of it, tuning a snare drum is not a very complicated process, but it is a critical process for getting the most out of a snare. Take the time to tune your snare drum whenever it is required to maintain the sound of your drum.
If your snare sounds good, the rest of your kit will sound that much better. A good-sounding snare is invaluable for every recording session and live gig, and it will make your practice sessions much sweeter as well. There is nothing like a well-tuned snare!