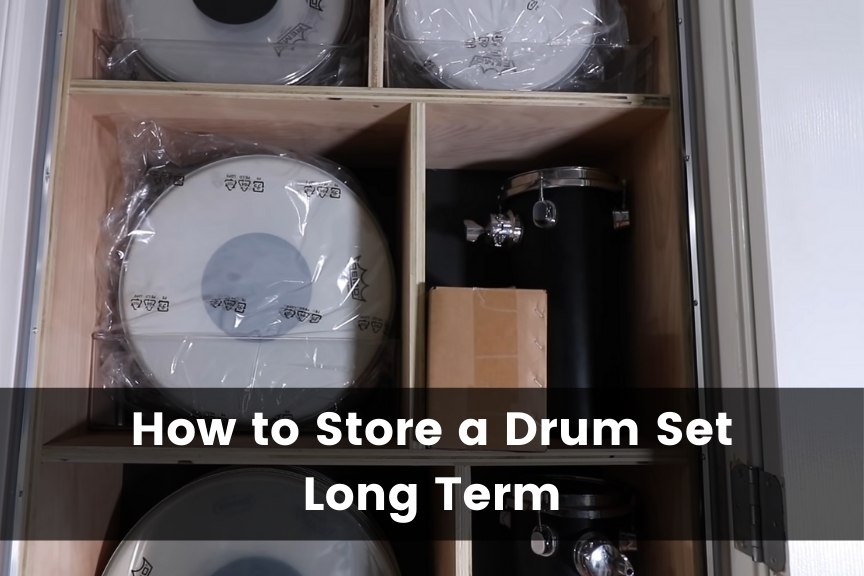
How To Store a Drum Set Long Term (8 Simple Tips)
Packing your drum set into storage boxes is neither an enjoyable nor an easy task. Therefore, for drummers who have found themselves in this situation, this guide is here to help you navigate the sometimes intimidating process of safely storing your instrument.
Here are a few tips to keep in mind when you’re preparing to store a drum set long term:
- Prepare your storage boxes ahead of time.
- Disassemble each drum completely and strip its hardware.
- Keep the small drum set parts in a separate resealable bag.
- Surround each drum with bubble wrap.
- Place the drum shells in a box or drum bag.
- Package tension rods and claws in padded bags.
- Secure drum’s metal legs and stands safely within the box.
- Maintain a consistent storage environment for your drum set.
In this article, I’ll walk you through how to store a drum set long term. We’ll go over the best storage methods to help protect your drum set when not in use. Keep reading to learn some of the best tips and techniques that will help keep your instrument in excellent condition for years on end.
1. Prepare Your Storage Boxes Ahead of Time
To best protect your drum set, you’ll need to store each set component individually. However, before you start disassembling your instrument for storage, make sure you have the right number boxes or containers you’ll need to use to hold each piece.
What Is a 5-Piece Drum Set?
To accurately determine the number of boxes you’ll need for storage, you’ll need to consider the type of drum set you have.
A 5-piece drum set is the most common type of drum configuration. It includes a bass drum, snare drum, floor tom, and two additional tom-toms. Most drum kits include cymbals; however, the number of cymbals can vary.
The size of the storage containers you’ll need will heavily depend on the size of your bass drum. Remember that it’s always a good idea to measure the pieces of your drum set before you begin disassembly to make sure you have appropriately-sized containers.
Storage Boxes Should Be Large Enough To Hold the Bass Drum
The bass drum is the largest part of the set. It typically sits on the floor and produces sound when the player steps on a pedal with their foot. As you might expect, the bass drum is the component that produces the lowest sound within the set. Its lower frequency comes as a result of its large volume and notable drum head thickness.
Bass drums typically range from 16-22 inches (40.64-55.88 cm) in diameter and can be as deep as 22 inches (55.88 cm). When storing your drum set, your largest box will likely need to be at least 24 inches (60.96 cm) in height, width, and depth. While packing your drums, you should aim to have no less than 2 inches (5.08 cm) of space between your instrument and the box on all sides while the drum shell is inside the box.
The Number Storage Boxes Will Vary Based on Components
Arguably the most effective method of drum set storage involves “nesting” small drums inside larger drums. This method is particularly helpful when you’re packing a drum set with many pieces, such as the traditional 5-piece set. Using the nesting method, you’ll ideally only need one box for all of the drum shells.
Depending on the size of your set’s cymbals and external hardware, you’ll most likely need at least one smaller box measuring at a minimum of 20 inches (50.8 cm) in width, height, and depth. This box will be used to store any additional hardware that may come with the set, including claws, tension rods, holders, and stands.
2. Disassemble Each Drum Completely and Strip Its Hardware
Disassembling your drum set into several individual components will make storage much more manageable. Not only will this process help protect each piece, but it’ll also make for a more space-efficient storage layout.
Stripping Drum Set Hardware Will Save Space in Storage
If you’ve never taken apart or put together a drum set before, you may be surprised by just how many pieces make up the whole set. In addition to the five drums that make up a 5-piece drum set, your instrument requires additional hardware to produce an optimal sound.
This hardware, as mentioned, can include claws and tension rods, in addition to the stands and holders that accompany the tom-tom drums. These pieces will need to be packed separately from the drum shells to save space and protect the shells from damage during transport.
Wrap Drum Hoops With Bubble Wrap for Added Protection
As part of the disassembly process, remove the hoops from either end of your drums. Then, wrap each of them in bubble wrap before placing it back on the drum. This layer of bubble wrap will add protection to both the drum and its hoops, which can be critical especially if you need to transport your drums to their storage location.
Wrap Legs Individually To Avoid Denting
Once fully disassembled, you should wrap each metal piece of your drum set individually. Surrounding the legs with packing paper, bubble wrap, or another thick padding material will ensure they aren’t damaged during transport. If you wrap more than one leg together, you risk denting the metal as the legs move around.
3. Keep the Small Drum Set Parts in a Separate Resealable Bag
Your drum set will be held together through some small components such as washers, claws, and tension rods. For easy reassembly in the future, keep all of these pieces organized.
Keeping separate resealable bags for each drum is an excellent way to ensure that these compact, easy-to-lose parts stay organized and safe. This process will make it easier for you to find and identify them whenever you need to put the drum set back together.
4. Surround Each Drum With Bubble Wrap
To avoid any dents or punctures throughout the packing and transport process, you’ll need to surround each of your drum shells with bubble wrap. Once you have stripped the drums of their hardware and packed their drum hoops accordingly, you can start wrapping the drums themselves. Wrap each drum at least twice around for optimal protection.
5. Place the Drum Shells in a Box or Drum Bag
Once you’ve disassembled each drum and wrapped it with bubble wrap, you’re ready to begin the “nesting” process. As the largest drum in the set, the bass should be sizable enough to hold both the floor tom and rack tom inside itself. Think of it as a similar concept to a Russian Nesting Doll; the smaller drums can nestle within the larger drums to save space.
With the heads removed, start by placing the floor tom within the bass. Afterward, add a layer of packing paper between the two to fill the empty space and stop them from moving around too much during transport.
Most rack toms are small enough to fit inside a floor tom. Therefore, after placing the floor tom within the bass drum, you should be able to put a wrapped rack tom inside the floor tom. To do so, follow the same process mentioned in the previous paragraph, and don’t forget to add a layer of packing paper between the drum shells. Continue nesting your drums until they’re all securely packaged within the box.
Create Cardboard Platforms for Storing Additional Drum Shells
If you have more than five drums to store, or your tom-toms won’t nestle inside each other, you can use spare pieces of cardboard to create platforms within your box. Then, you can set any additional drums or pieces on top of the layer of cardboard. Using cardboard platforms to divide your storage box is an excellent way to protect all the drum components while maximizing storage space.
Drum Bags Are an Effective Alternative to Boxes
Some drummers prefer to pack their drums using drum bags. However, it’s essential to note that most drum bags aren’t very space-efficient, making them better suited for temporary storage. They can also be a very expensive alternative, especially compared to cardboard boxes.
However, if you have ample storage space and no budget limitations, purchasing a set of drum bags to store your drum set might be an excellent option for you. Drum bags are a safe and time-efficient alternative to packing all your drum components into a box.
If you think you might need to frequently take your drums in and out of storage over the years, drum bags are an excellent way to speed up the process of packing and unpacking them. If you’re interested in taking this route, consider this 5-piece padded Gator Drum Bag Set (available on Amazon.com).
These drum bags are made out of a durable nylon material perfect for long-term use. Additionally, they come equipped with convenient carrying straps, making their transport much more manageable.
6. Package Tension Rods and Claws in Padded Bags
It’s crucial to be careful about any small or loose parts that could shift around in the box and damage your drums during transport or shipping. To avoid any unnecessary harm to your instrument, make sure to include additional padding to the resealable bags containing the drums’ hardware.
A few layers of bubble wrap around the bags should do the trick and keep all the small metal pieces adequately contained.
Once you’ve packaged and padded any additional hardware, you can place the resealable bags inside the innermost tom-tom of your nesting setup. After placing the bags safely inside the drum, place the head back onto the tom-tom to ensure the bags stay contained within the drum.
7. Secure Drum’s Metal Legs and Stands Safely Within the Box
Now that all of the drum heads and their additional hardware are securely packaged into the box, you can think about securing the larger metal components into the storage setup. Make sure you’ve filled all empty space within the box with packing paper for the utmost protection. It’s worth reiterating this step, as it’s crucial in preventing the pieces from shifting around and getting damaged.
With all the empty space filled, you should be able to lay the floor tom’s legs on top of the packing paper. At this point in the packing process, you’ll want to evaluate your current situation to determine the safest way to pack the legs. If your drums are larger than average, it may be challenging to fit the legs inside the box in a way that won’t damage the drums.
If this is the case, use a separate, smaller box for the metal legs. Overall, it’s better to be overly cautious than risk damaging your instruments. The same packing technique applies to cymbals; if you don’t have enough space to safely store them with the shells, feel free to keep them in a separate box.
Place Flat Pieces at the Top of the Box
Once you’ve found a safe way to store your tom-tom legs and stands, you can finish packing the final pieces of your drum set. Any relatively flat components like the drum heads can lay safely on top of the box. Packing them this way will ensure they don’t get broken by any heavier pieces within the box.
8. Maintain a Consistent Storage Environment for Your Drum Set
It’s crucial to maintain a relatively consistent environment for your stored drums, especially when it comes to climate. Environmental conditions like extreme temperatures, sunlight, and humidity can affect the quality of your drums over time.
Avoid Direct Sunlight
Whenever possible, you should avoid storing your drums in an area exposed to direct sunlight. Direct sunlight is a source of extreme heat. Exposing your drums to it for an extended amount of time can compromise the integrity of the glue and other components that hold the instruments together.
One of the easiest ways to protect your stored drums from direct sunlight is to place them in an area away from any windows to the outdoors.
How Does Heat Affect Drum Sets?
Extreme heat can melt the glue and alter the overall structure of drum sets. In addition, exposure to heat can warp drum shells, damage the exterior finish, and soften any plastic components.
A little bit of warmth is okay; it’s when the temperature rises above 90°F (32.22°C) that you should be concerned about your drums. Ideally, it would be best to store your drum set indoors, where it’ll be less likely to suffer from exposure to extreme temperatures.
How Does Cold Affect Drum Sets?
Cold environments can cause drum sets to go out of tune. Both the temperature and the amount of time your drums are exposed to the cold are factors that affect the rate of this process.
In general, room temperature makes for an ideal condition for the long-term storage of your drum set. However, not everyone has space inside their house for extended storage of something as large and cumbersome as a drum set.
As a result, many people resort to storing drum sets in their garages or basements. The environment of a garage is typically safe for drum storage, but be aware that the instruments may fall out of tune.
A Dry Storage Environment Is Key to Drum Protection
One of the most crucial aspects of choosing a storage environment for your drums is moisture control. It’s imperative that when you’re choosing a place to store your drums, make sure the area will stay as dry as possible. Water and humidity can damage drum components in various ways, including causing rust, mildew, and warping.
In general, the cooler temperatures of a garage are more likely to be accompanied by a lower humidity level in the air. These conditions are ideal for the long-term storage of drum sets. However, be aware of any other sources of water that might be present in garage environments. Water leaking in from the outside could be a severe concern for your stored instrument.
Rusting Can Affect Metal Components of Drums
For most instrument owners, avoiding water is a rule of thumb. Water can be highly detrimental to your drum set due to its ability to rust metal components. Rust naturally forms due to the chemical properties of water, oxygen, and metals (like iron).
As a result, leaving your drum set stored in a wet area can lead to rusting in their hardware. Rust can permanently damage the metal, which is why finding a dry, dark place to store your drums is one of the most crucial factors you’ll need to consider.
Mildew and Mold Can Grow Inside Drums
Most marching band players understand the danger of water to drums. The same concerns apply to stationary drum sets. Wet and humid areas serve as perfect environments for mold and mildew to grow.
Fungus growth can also be harder than you’d think to get rid of, yet another reason why it’s essential to avoid wet storage environments whenever possible.
Water Can Warp Drum Heads and Shells
Nowadays, most drum heads are made of polymer or plastic material. However, water is still a concern. Water can affect the composition of your drum heads, which in turn could ruin your their sound.
Water can also be hazardous to drum shells, considering they’re typically made out of wood. When exposed to water for an extended period, wood is likely to warp and change shape. Warping is a severe concern for drums in particular; changes in the material can affect the sound and overall integrity of the instrument.
Conclusion
Although it can seem daunting at first to pack up your drum set for long term storage, there are a few key steps you can follow to make the process easier. Here are some of the best ways to safely and effectively store your drums:
- Strip all drums of hardware before storage.
- Nest drums inside each other for space-efficiency.
- Fill all empty space in the storage box with packing paper and bubble wrap.
- Avoid wet and humid storage environments.